
 What is the first step when building a tiny house on wheels, after research and buying the actual trailer? Building the foundation!
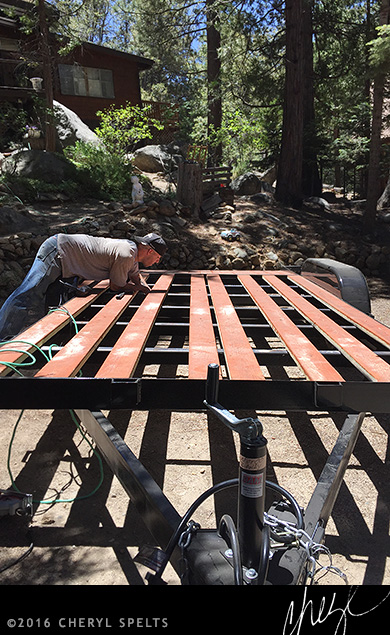
The first task was to remove half of the deck boards. They’re 2x6s, so heavy, and a solid deck wasn’t necessary, so to make the load lighter, I planned to remove every other one–and of course they were bolted on with hardware that required a lot of strength to remove!
Because I wanted my house to be 10’6″ wide, instead of the traditional 8’6″ wide, I needed to build over the wheel wells, so my foundation framing is done with 2×10 Douglas Fir–which makes the foundation tall enough to clear my wheels wells.
Each 2×10 was 10’6″ or 12′ in length, and so over 100 pounds. I definitely needed to hire someone strong to help get the foundation done.
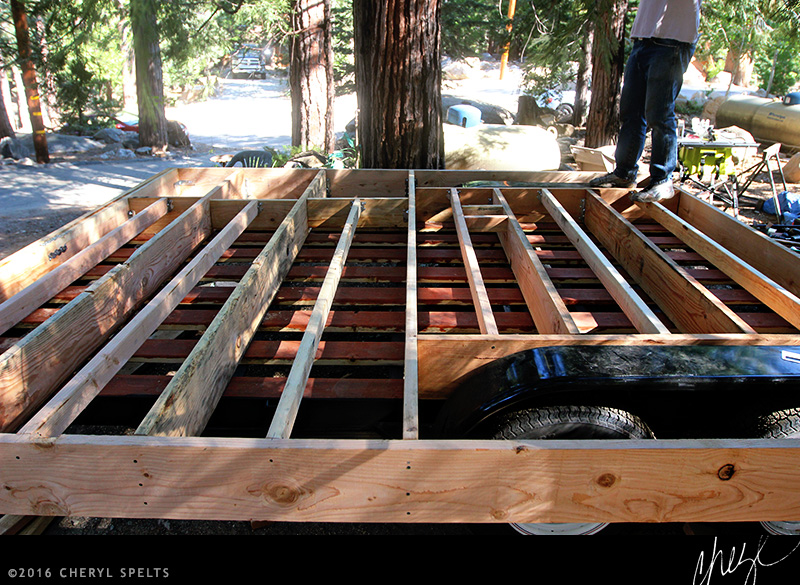
The foundation framing with 2x10s is 24″OC, which is normally just fine–but I wanted to make sure my floor didn’t flex too much, so I decided to insert a 2×4 joist in between each of the 2×10 joists, so my floor would be supported every 12″ instead of every 24″. Why a 2×4? Because they’re much lighter than a 2×10 or even a 2×6, and since it was only to keep the floor from flexing too much, even a 2×4 was sufficient. You can see the blocking on the far left, for the porch, and the blocking in the far center, for the toilet, and blocking around each wheel well.
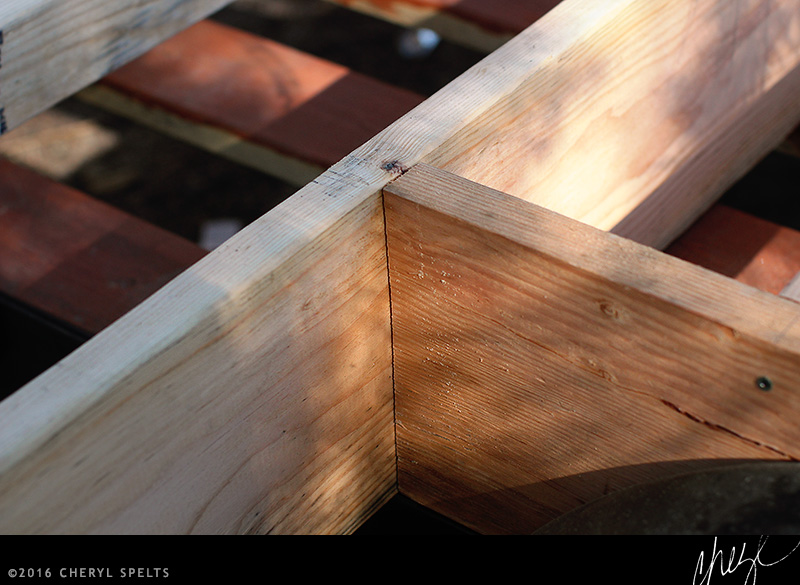
Close up of the way the blocking for the porch butts up against a floor joist.
Matthew, the guy I hired to put the foundation together, felt that we needed more bulk at the front end of the trailer, so he used one 10’6″ 2×10, and then glued and screwed two pieces of 2×10 to it, to make it double in width, and then used Simpson Strong Ties at the join. The join is on the inside, and the full size 2×10 is on the outside, so it’s plenty strong.
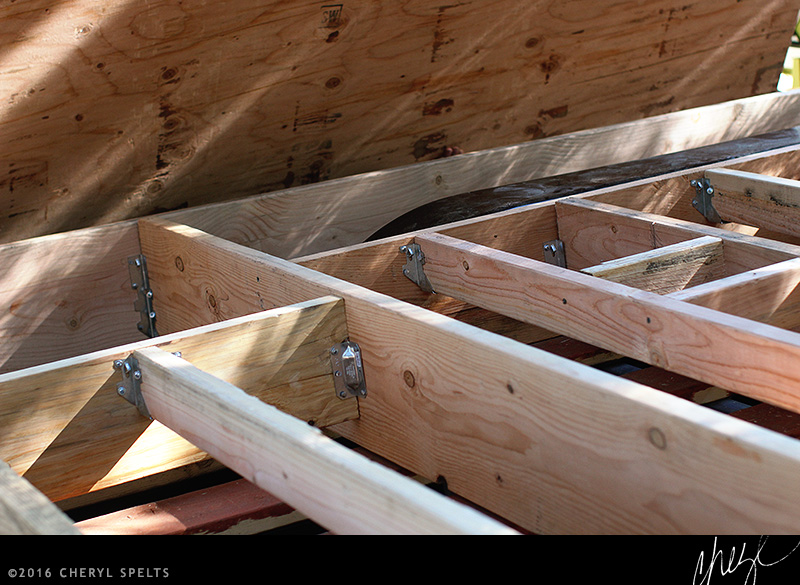
Right before the first layer of 1/2″ plywood sheathing got dropped on top… I wanted to document the Simpson Strong Ties that were used in the foundation. Each 2×10 joist had a 2×10 joist hanger on both ends, and the 2×4 joists, had 2×4 joist hangers on both ends. And where we needed blocking, for the porch, corner Gusset Angles were used.
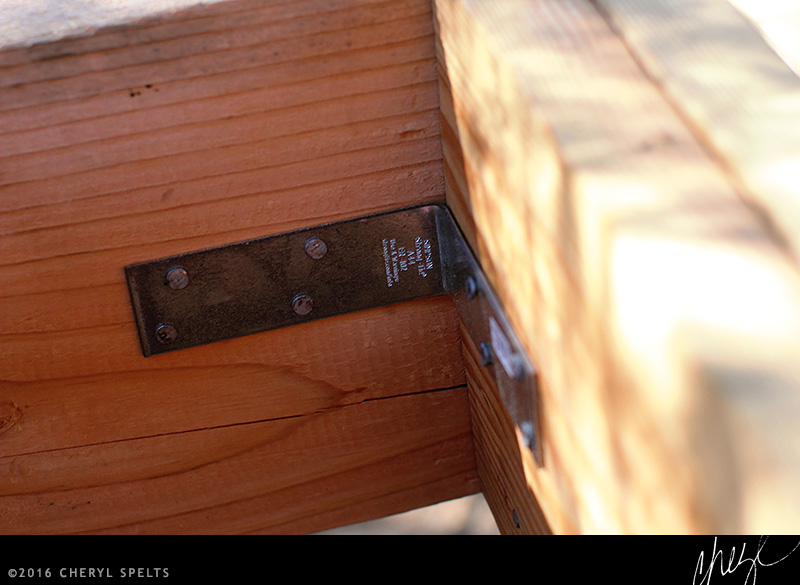
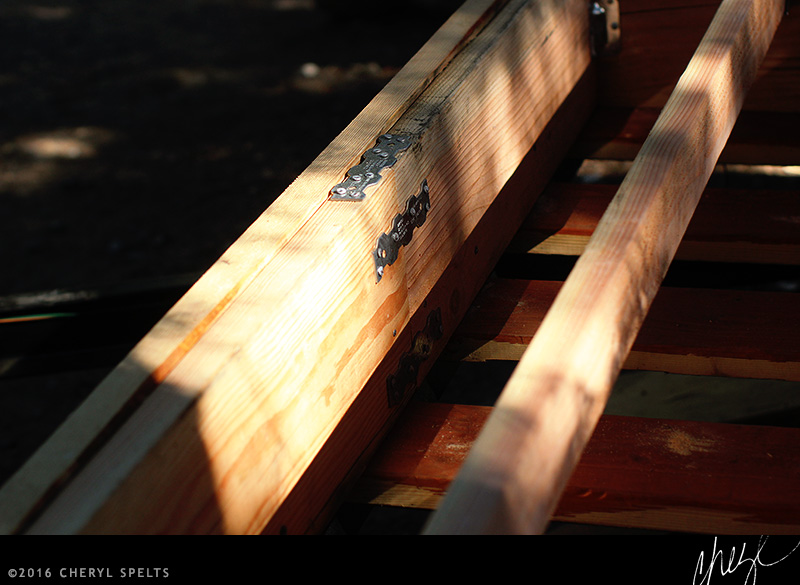
Simpson Strong Tie Corner Ties were used on the four corners, where the 2x10s met.
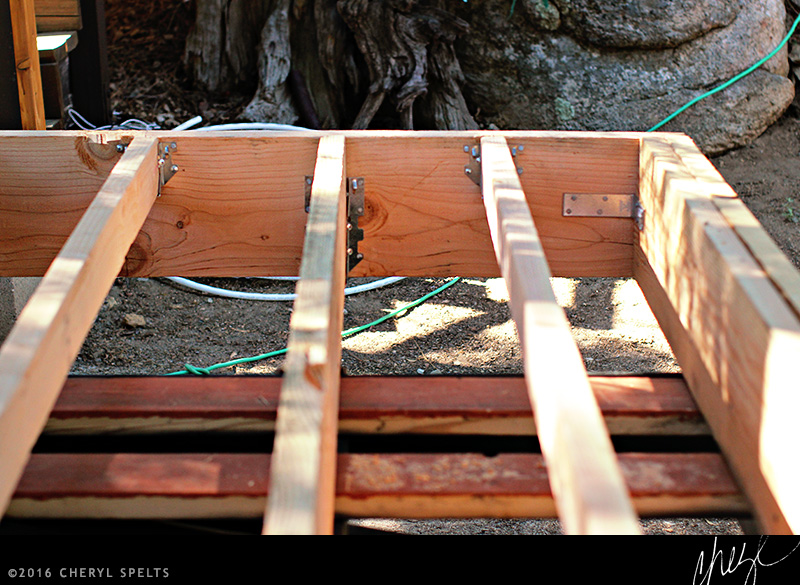
A shot of both a 2×10 and the 2×4 joist hangers, along with a corner tie, all by Simpson Strong Ties. You can also see how the foundation hangs off the edge of the trailer, by about a 12″ on each side.
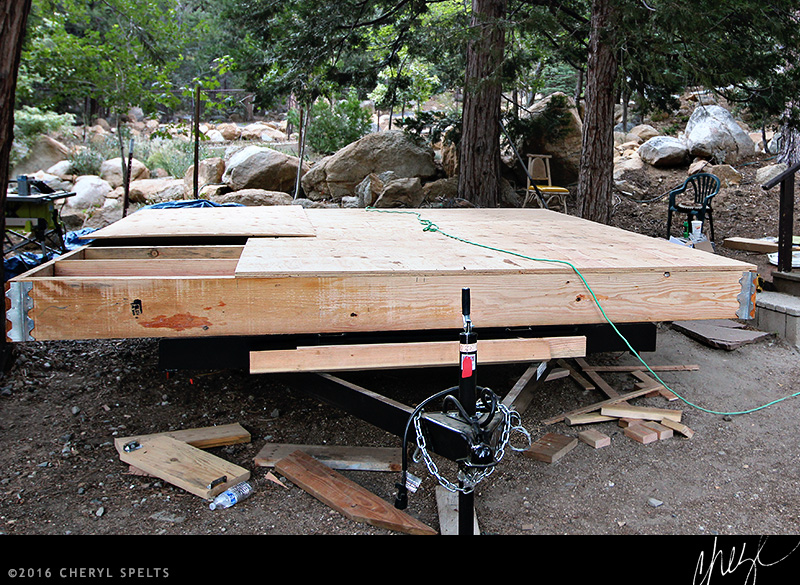
The foundation with two layers of 1/2 plywood, glued and screwed down. Why two layers of 1/2″ instead of one layer of 3/4″? Two reasons! First, I could lift a 1/2″ piece of plywood, and I wasn’t sure how much help I would need to build the foundation, so I whenever I could make a choice that meant I could do the work if needed, I did. And second, by gluing and screwing down one layer of plywood first, and then gluing and screwing down the second layer, with overlapping seams, I ended up with a floor that is one big glued piece of plywood, rather than a floor made up of individual pieces that might shift or move on their own. It was just one more way to make my foundation and floor as stable and strong as possible.